Stock transfers
Move stock from one warehouse to another in a single completed transfer. There is no draft/pending status in Admin — confirming the transfer moves quantity immediately.
Who and where
- Roles: Stock, Admin
- Routes:
/warehouse/transfers(history),/warehouse/transfers/new(create) - Nav: Warehouse Management → Stock Transfer
Related: Stock and warehouses.
1. Open Transfer History
- Sign in to Admin.
- Open Warehouse Management → Stock Transfer (
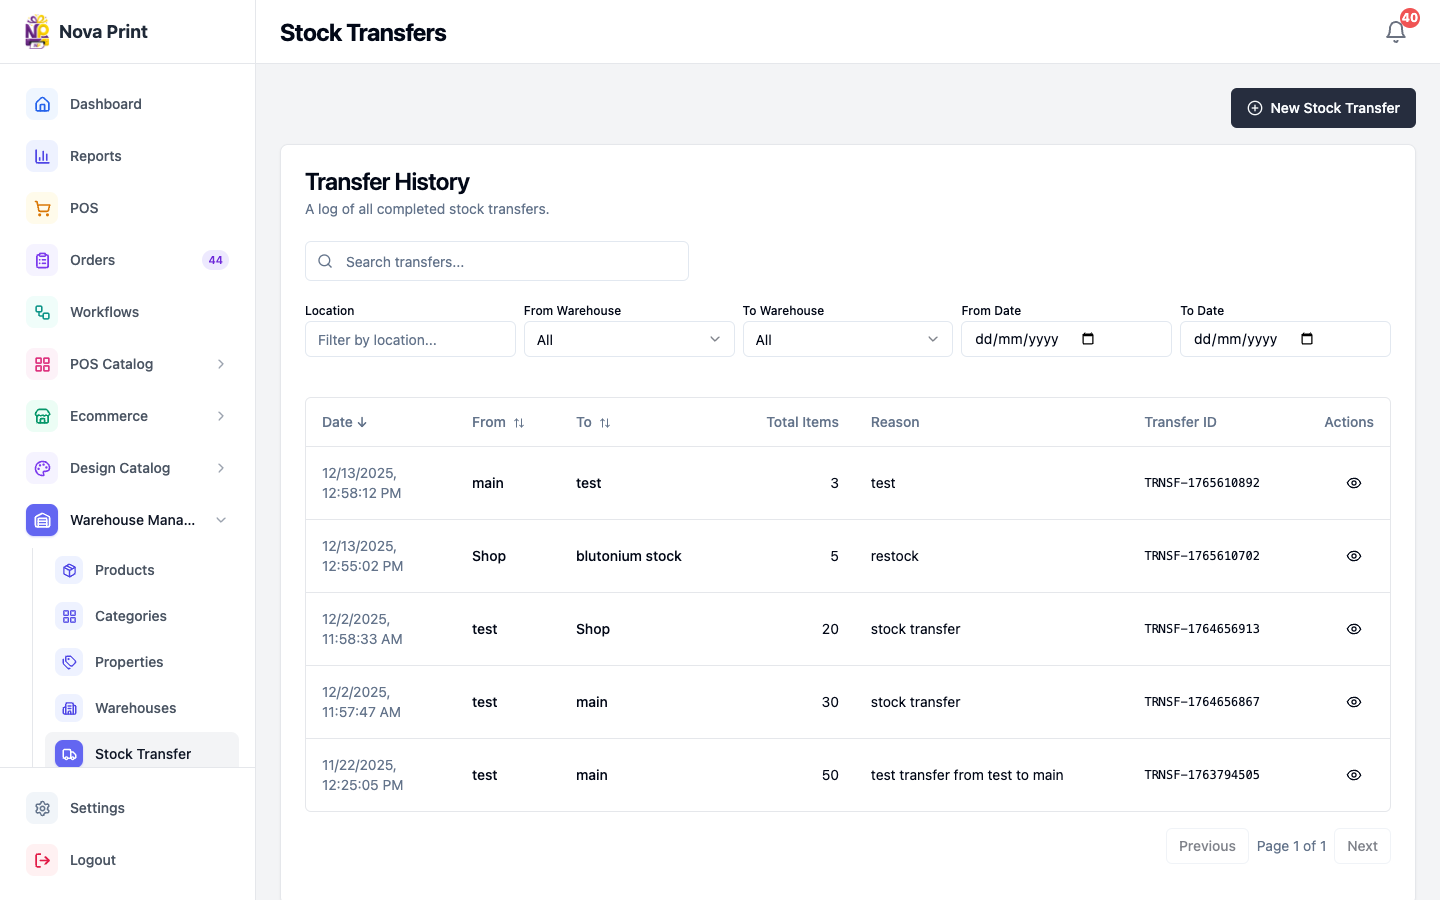
/warehouse/transfers). - Review Transfer History — A log of all completed stock transfers.
- Filter with Search transfers..., Location, From Warehouse, To Warehouse, From Date, To Date as needed.
Columns: Date, From, To, Total Items, Reason, Transfer ID, view.
2. View a past transfer
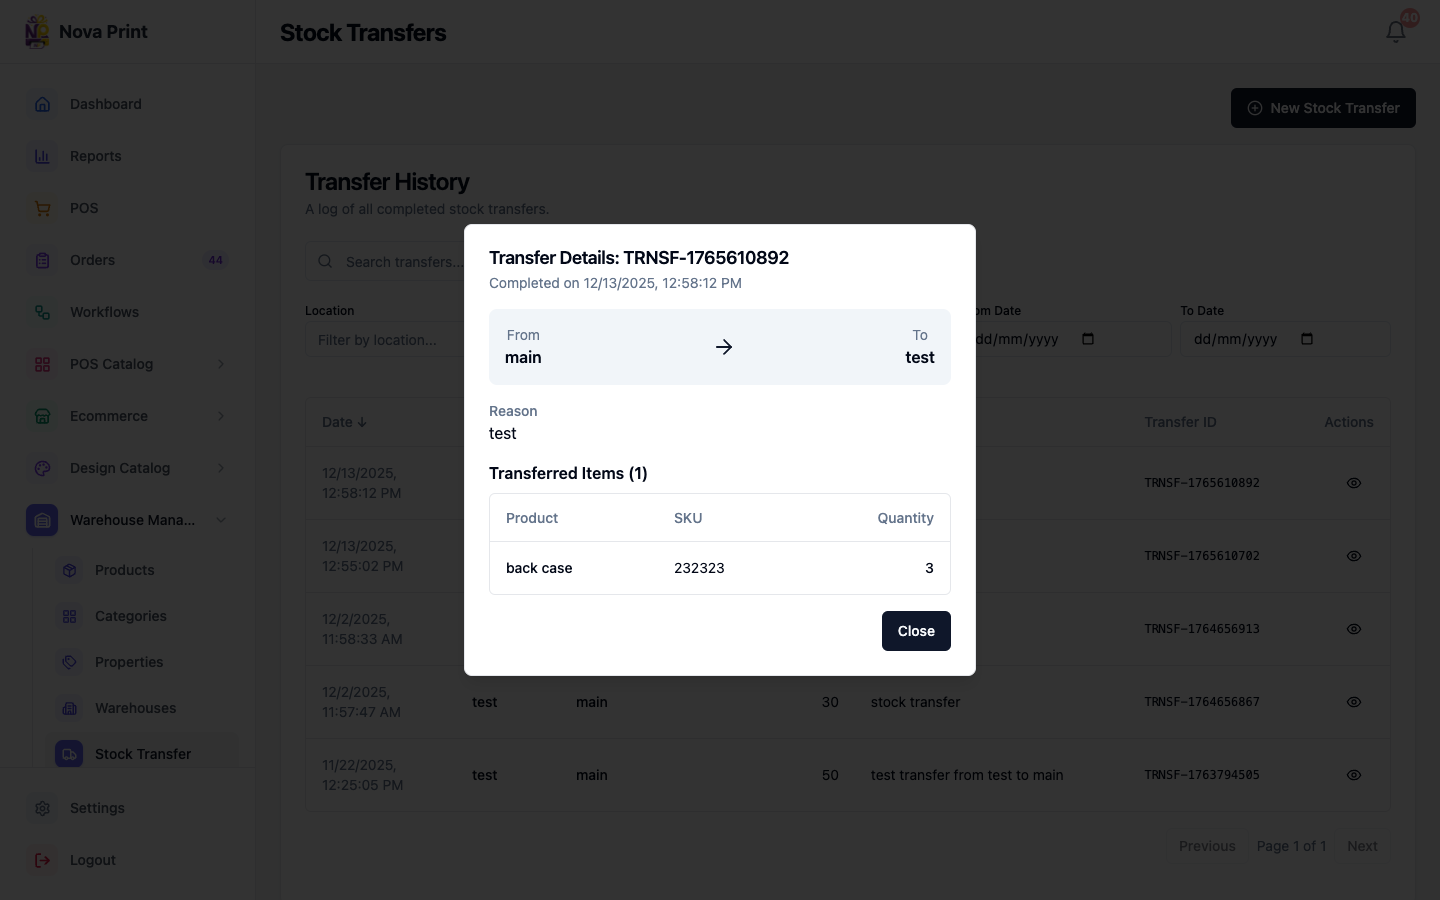
- Click the eye / view action on a row.
- Open Transfer Details: {reference}.
- Confirm Completed on {date}, From/To, Reason, and Transferred Items (Product, SKU, Quantity).
Transfer ID in the UI is the backend reference (format like TRNSF-{timestamp}), not only the numeric id.
3. Start a new transfer
- Click New Stock Transfer (goes to
/warehouse/transfers/new). - Use Back to Transfers if you need to leave without saving.
4. Select warehouses
Section 1. Select Warehouses:
- Choose Source Warehouse (Select source...).
- Choose Destination Warehouse (Select destination...).
- Same warehouse cannot be both source and destination (disabled in the opposite select).
- Changing the source clears the item list — re-add items if you change source.
5. Add items
Section 2. Add Items to Transfer (visible after source is selected):
- Tab By Product:
- Search Search products in source warehouse....
- Rows show SKU and Stock — click Add.
- Tab By Category:
- Use Add All for a category of products in the source.
- Watch for toasts: Product already in list, Products Added.
6. Set quantities and review
Section 3. Transfer Items:
- For each line, set Qty (must be between 1 and available; UI shows Avail:).
- Remove lines you do not need.
- Click Review Transfer when both warehouses are set, at least one item exists, and quantities are valid.
7. Confirm the transfer
In Review Stock Transfer:
- Check From/To and Items to be Transferred.
- Enter Reason for Transfer (Required).
- Click Confirm Transfer (or Cancel to go back).
- On success, toast Transfer Successful! and you return to the history list.
Stock at source decreases (Transfer Out); destination increases (Transfer In). See history on warehouse product rows.
What you cannot do in Admin UI
- No edit, cancel, or reverse of a completed transfer in the warehouse UI.
- No multi-step approval workflow — treat confirm as final.
Verify in UI if your process needs a paper/approval step before clicking Confirm Transfer.
Checklist
- Source has enough quantity for every line.
- Destination warehouse is the correct physical site.
- Reason is filled for audit.
- After confirm, spot-check View History on a product in both warehouses.