Stock and warehouses
Warehouses hold product quantities. Create a location, assign products, then adjust stock with a reason.
Who and where
- Roles: Stock, Admin
- Routes:
/warehouse/warehouses,/warehouse/warehouses/:warehouseId - Nav: Warehouse Management → Warehouses
Related: Create a product, Stock transfers.
1. Open Warehouses
- Sign in to Admin.
- Open Warehouse Management → Warehouses (
/warehouse/warehouses). - Optional filters: Search by name or location..., Filter by location..., Low Stock Only.
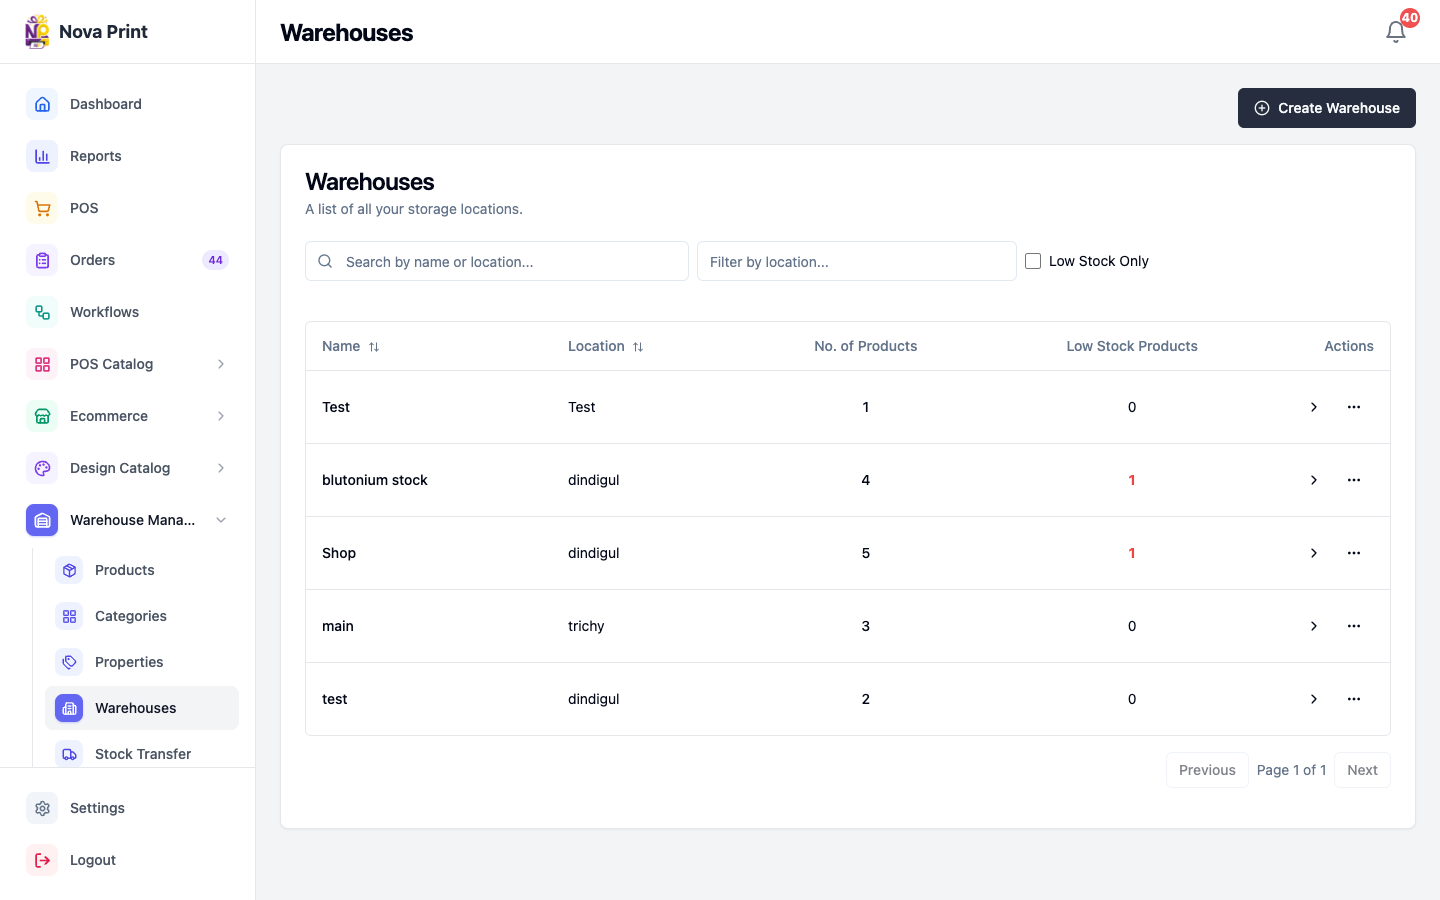
Low stock: quantity ≤ the product’s Restock Threshold (set on the product).
2. Create a warehouse
- Click Create Warehouse.
- In Create New Warehouse:
- Enter Warehouse Name.
- Enter Location (placeholder example: e.g., 123 Main St, City).
- Click Create Warehouse.
- Confirm the row: Name, Location, No. of Products, Low Stock Products, Actions.
To edit: menu → Edit → Save Changes.
Verify in UI: deleting a warehouse when products or transfers still reference it — confirm what the UI/API allows before removing production locations.
3. Open warehouse details
- Click the chevron / Manage Products on a warehouse row (opens
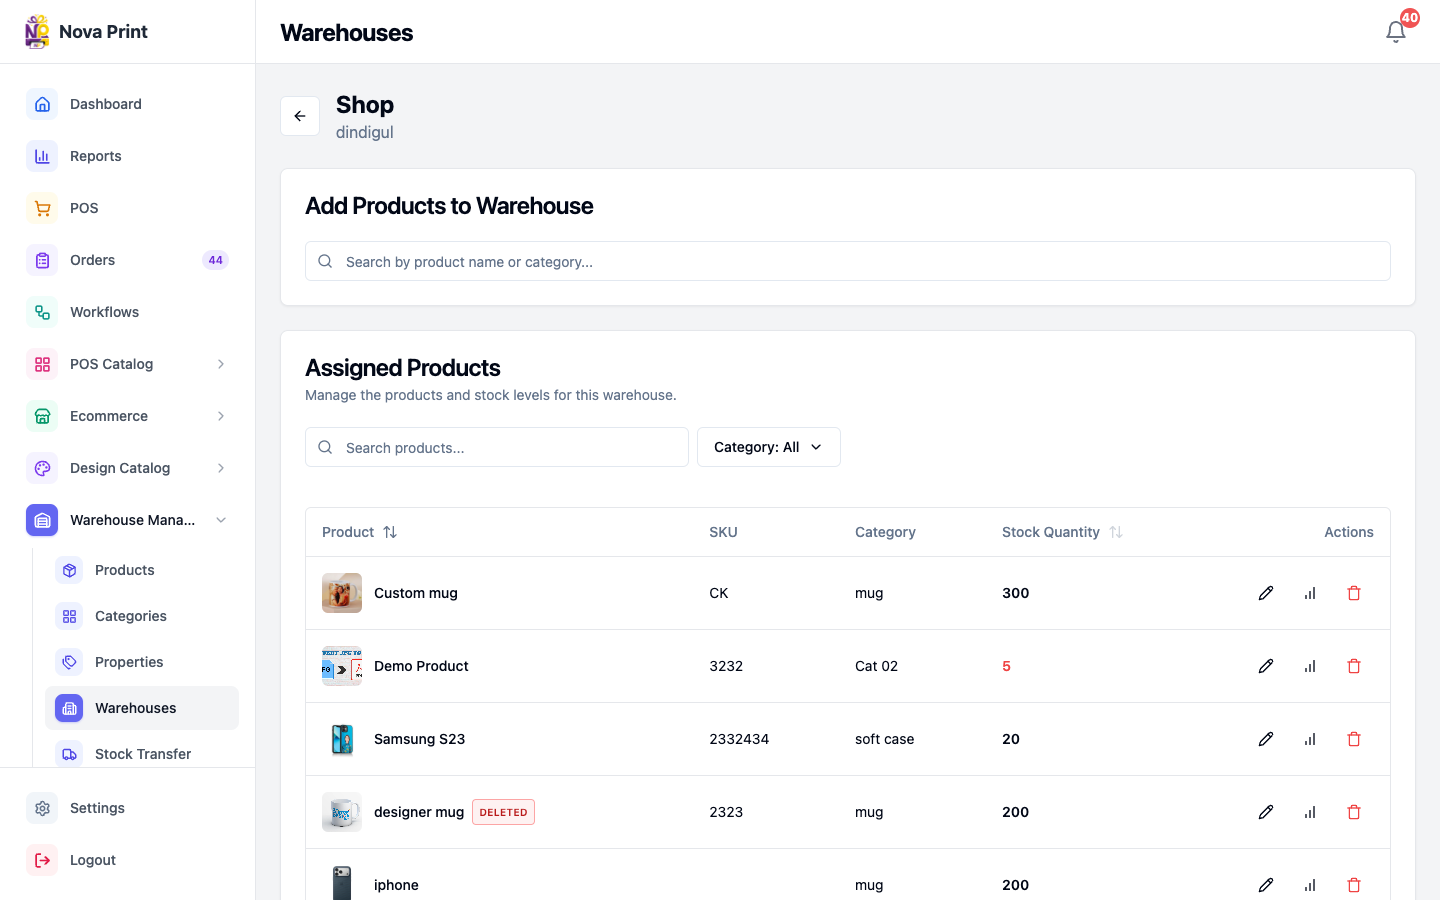
/warehouse/warehouses/{id}). - Confirm header shows warehouse name and location.
- Use back control to return to the list when done.
4. Assign products to the warehouse
New assignments start at quantity 0.
- Click Add Products to Warehouse.
- Search with Search by product name or category....
- Under Categories, use Add All for a whole category, or under Products add one product at a time.
- Close the selector and confirm items appear under Assigned Products.
Filters on assigned list: search, Category: All / ….
Columns: Product, SKU, Category, Stock Quantity (red when low), Actions.
5. Adjust stock
- On an assigned product row, click Adjust Stock.
- In the dialog:
- Read Current Stock.
- Enter Adjustment Quantity (+/-) (example:
10or-5). - Enter Reason for Adjustment (Required).
- Click Save Adjustment.
- Toasts block empty reason (Reason Required) or zero change (No Adjustment Made). Negative resulting stock is rejected by the API.
6. View stock history
- Click View History on a product row.
- Open Stock History: {product}.
- Review Date, Type (Adjustment, Transfer In, Transfer Out), Reason / Details, Change, New Qty.
7. Remove a product from a warehouse
- Click Remove Product on the row.
- Confirm removal. Verify in UI for exact confirm copy and whether non-zero stock must be cleared first.
8. View stock from the Products list
Shortcut without opening a warehouse:
- Go to
/warehouse/products. - Click View Stock on a product.
- Review Stock Details: {name} — Warehouse, Location, Quantity.
Checklist
- Warehouse name and location are correct for the physical site.
- Products you sell are assigned (even at qty 0).
- Opening stock adjusted with a clear reason.
- Low-stock threshold on products matches how you monitor Low Stock Only.
- For moves between sites, use Stock transfers instead of two manual adjustments when possible.