Create an in-store order
Walkthrough for selling at the counter: add products (or designs) to the cart, choose shipping, then pay with UPI screenshot or Payment Done Later.
Assumes you are unlocked on /{posSlug} — Login and navigation.
Path A — start from Catalog
- Open Catalog.
- Browse products, custom categories, add-ons, or design collections.
- On a product, click Add to POS (unavailable / out of stock items cannot be added).
- You are taken to POS (
/{posSlug}/pos) with those items in Current Order.
For a design from Catalog: open the collection → design → run the property wizard → Add to POS.
Path B — start on POS checkout
- Open POS in the header.
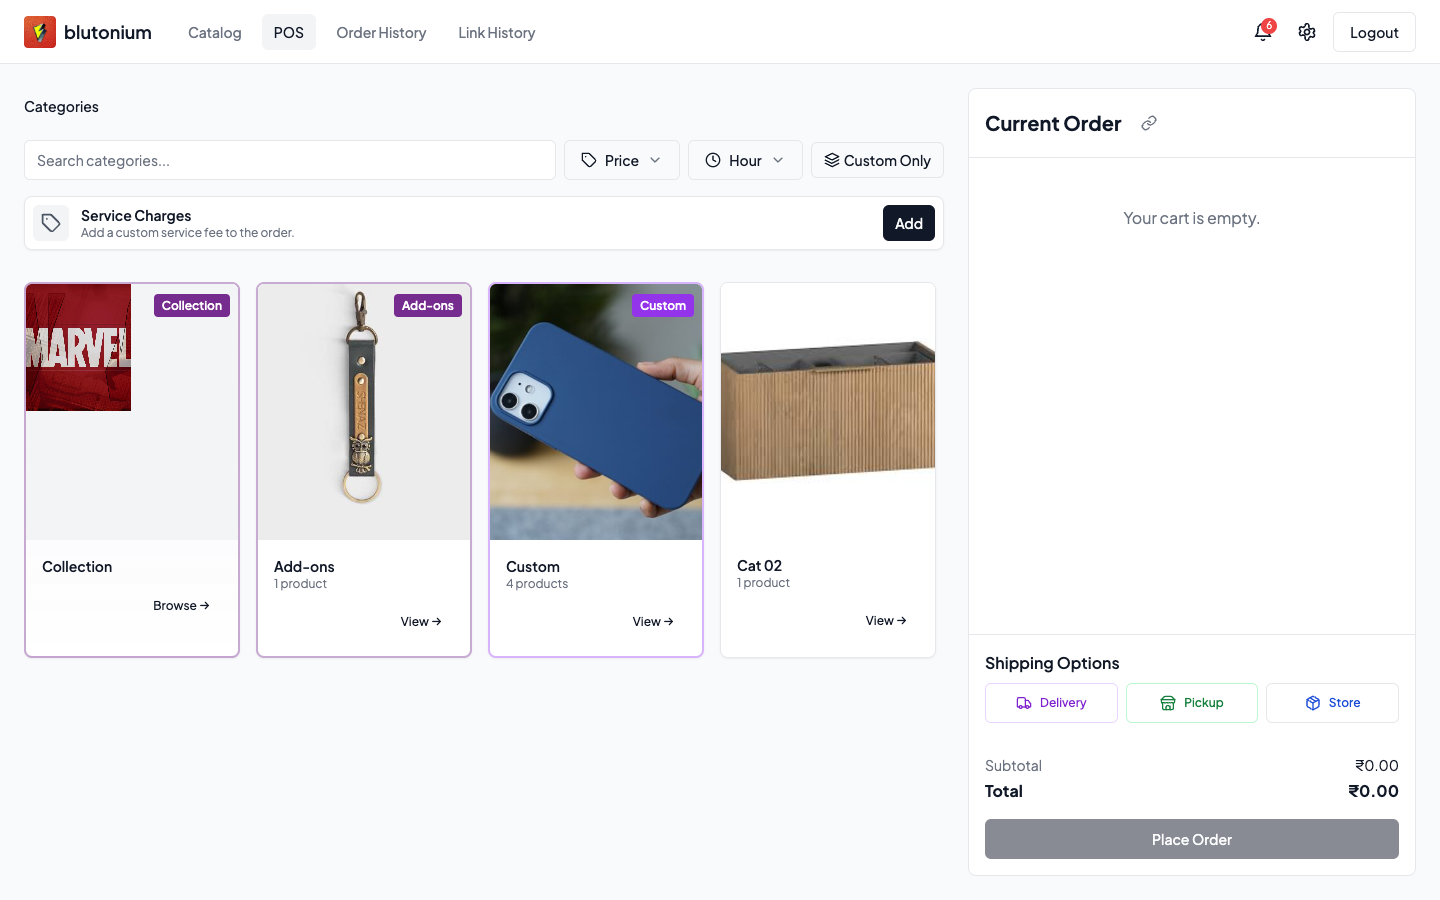
- On the category grid, pick a category, Add-ons, or Collection (design catalog).
- Use search / price / hour filters and Custom Only as needed.
- Click Add on a product (or open a design and complete the wizard — see below).
- Optional: on the categories toolbar, use Service Charges → Add to add a line using the terminal’s default service charge; edit the ₹ amount in the cart or Remove.
Designs wizard (on POS)
- Open Collection → a design collection → a group → a design.
- In the wizard, choose each property step (e.g. model), then confirm the product.
- Click Add to POS (wizard label). The cart shows a Catalog Design line (preview + SKU); no custom image upload is required for catalog designs.
Custom (non-design) items
Customizable products appear as custom category lines. In the cart:
- Select the product variant if prompted.
- Click Upload Images and attach at least one image before placing the order (required unless the line is a catalog design).
Shipping
In Current Order, under Shipping Options, choose one:
| Button | Behavior |
|---|---|
| Delivery | Opens Shipping Details: customer name, address lines, city, state, postal code, optional phone → Save Details. Shipping cost is quoted from the postal code. |
| Pickup | Sets pick-up-at-shop; shipping cost 0. |
| Store | Uses the store address from POS Settings → Store Address. If address is incomplete, you get a warning to configure Settings first. |
You can Remove shipping and choose again. For delivery, Edit Details reopens the address form.
Place order and payment
- Confirm cart lines, quantities, and total (subtotal + shipping when applicable).
- Click Place Order.
- In Complete Payment:
- Note the temporary Order ID shown in the modal.
- If a UPI QR is configured in Admin → Settings → Payment, scan it and pay the total.
- Either upload a payment screenshot, or check Payment Done Later (screenshot optional; instructions mention sharing the Order ID on WhatsApp).
- Click Place Order in the modal to submit.
On success, the cart clears and a toast confirms the order. Find it under Order History.
If no Admin UPI QR is set, the modal says none is configured and points to Admin Settings — you can still use Payment Done Later.
Link related orders (before place)
- On Current Order, click the link icon (title Link to existing orders).
- In the link modal, search and select existing order IDs for this terminal.
- Confirm selection. The cart header shows how many orders are linked; a line under the cart lists Linked to N order(s): ….
- Place the order as usual — linked IDs are sent with the create payload.
To link orders after they exist, open Order History → order detail → Link to Another Order / Manage Links — Order history and edits.
Tips
- Leaving Catalog / POS / Designs for other tabs (e.g. Order History) clears the in-progress cart.
- Ship to My Store needs a saved store address — Settings UPI QR also covers Store Address.